Nội dung
ToggleNail Trauma Isn’t Always Visible — But It Affects Every Service
Clients often come in saying:
“My nail keeps breaking in the same place.”
“This nail feels weak but I don’t remember hurting it.”
“My nail suddenly split down the middle.”
“One nail grows different from the others.”
These are NOT random events.
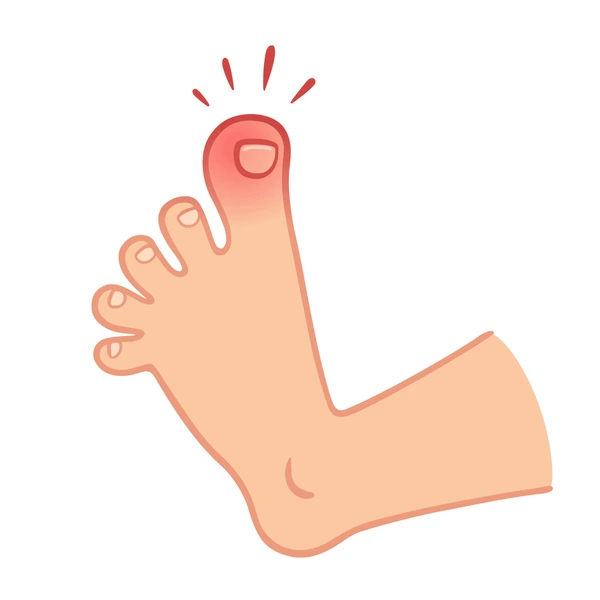
These are signs of nail trauma — something every nail technician must know how to diagnose and treat.
Nail trauma disrupts:
Keratin structure
Adhesion
Free-edge stability
Nail plate flexibility
Gel retention
Shape durability
Growth consistency
Trauma can happen instantly (impact) or gradually (micro-stress).
If technicians do not identify trauma early, every service afterward becomes unstable.
This is the complete OBB Nails technical guide to nail trauma, how it happens, and how to build a safe recovery plan for clients.
1. Types of Nail Trauma — What Technicians Must Recognize
There are two categories:
Macro-trauma (big, obvious injury) and Micro-trauma (small repeated injuries).
Understanding both is essential.
1.1 Macro-Trauma (Visible, Instant Damage)
Caused by:
Slamming finger in door
Bending nail backward
Heavy object impact
Deep crack or tear
Nail plate lifting from nail bed
Subungual hematoma (blood under nail)
Painful stress line break
Technician note:
Macro-trauma often requires trimming AND extended reinforcement.
1.2 Micro-Trauma (Silent but Repetitive)
This is the #1 cause of chronic weak nails.
Caused by:
Filing back-and-forth
Using coarse grits
Over-buffing
Tapping nails on hard surfaces
Peeling gel polish
Typing with nail tips
Opening cans or packages
Pressing nails into objects
Dry cuticle pushing
Sleeping with fists curled
Long nails hitting surfaces repeatedly
Technician note:
Micro-trauma creates invisible micro-fractures that lead to repeated breakage in the same spot.
2. What Trauma Does Inside the Nail Plate (Professional Biology)
Trauma damages the keratin architecture of the nail.
Trauma causes:
Keratin layer separation
Micro-cracks
Weak stress line
Thin and soft free edge
Reduced nail density
Disrupted matrix output
Slower growth
Uneven plate formation
Even when clients don’t “feel” the trauma, the plate is compromised.
3. How to Identify Nail Trauma During a Consultation
Technicians should learn the visible and invisible signs.
3.1 Trauma Indicators:
Breaks always in the same spot
Peeling at free edge
Vertical split forming slowly
Thin plate at one specific side
White marks or stress lines
Sudden ridge on one nail only
Chalky area near the break
Tenderness when pressing the plate
Nail that bends more than others
A corner missing repeatedly
These clues tell you the injury is structural, not superficial.
4. Technician Protocol: How to Handle Nails With Trauma
This is where your technique matters most.
Step 1: Do NOT Use High-Stress Shapes
Avoid:
Sharp square
Coffin
Almond (if sidewalls are weak)
Long lengths
Recommended:
Round
Squoval
Soft oval
Shape determines stress distribution — critical for traumatized nails.
Step 2: Shorten Nails to Reduce Leverage
Trauma + long nails = automatic re-break.
Short → Medium length ONLY during recovery.
Step 3: Reinforce With Flexible Foundation, Not Rigid Layers
Aging or traumatized nails cannot support hard coatings.
Use:
1–2 thin layers
Seal corners carefully
Maintain weekly refills
Why:
Fills micro-cracks
Supports weakened stress zones
Adds strength without brittleness
Reduces further separation
Step 4: Seal the Free Edge Every Visit
The free edge is the trauma “exit point.”
Technicians must:
File gently with OBB File
Seal with Foundation Base
Cap with OBB Crystal Shine or Velvet Matte top coat
This prevents water infiltration and peeling.
Step 5: Avoid All Aggressive Prep Techniques
Never:
Over-buff
Use coarse grits
Perform dry cuticle pushing
Thin the center of the plate
File straight across without control
Trauma raises sensitivity — prep must be minimal.
Use:
OBB Buffer only for soft smoothing.
Step 6: Protect Nail From Water and Chemicals
After trauma, nails absorb more water → swell → shrink → peel.
Educate clients:
Use gloves when cleaning
Avoid long showers post-service
Apply oil after every hand wash
Step 7: Hydrate Daily to Restore Flexibility
Traumatized nails become brittle because they lose moisture.
Recommend:
Cuticle Oil Pen
2× daily
Massage into matrix, sidewalls, & plate
Hydration reduces the likelihood of further cracks.
Step 8: Avoid Heavy Extensions or Excess Weight
Until trauma grows out, technicians must avoid:
Hard gel extensions
Acrylic overlays
Thick structured layers
Long shapes
These stress the weakened keratin layers.
5. Technician Timeline: How Long Trauma Takes to Grow Out
|
Trauma Type |
Full Recovery Timeline |
|---|---|
|
Peeling |
2–4 weeks |
|
Micro-cracks |
3–6 weeks |
|
Repeated break point |
4–8 weeks |
|
Deep crack |
6–12 weeks |
|
Matrix trauma |
3–6 months |
The nail can only “heal” by growing forward — trauma becomes less noticeable as the new nail replaces the damaged portion.
6. What NOT to Do on a Traumatized Nail (Critical for Technicians)
Avoid:
Buffing plate to smooth trauma
Filing into cracks
Cutting corners too sharply
Forcing long shapes
Rigid or thick enhancements
E-file prep on thin, traumatized nails
Exposing nail to acetone repeatedly
Letting nails overgrow between appointments
Trauma must be handled with caution, precision, and gentle reinforcement.
7. The OBB Nail Trauma Professional System
Here is the full technician workflow using OBB products:
Prep
Minimal filing with OBB File
Gentle buffing with OBB Buffer
Hydrate cuticles before pushing
Reinforcement
1–2 layers of OBB Foundation Base
Seal stress points
Cap free edge
Shaping
Short length
Round/squoval only
Avoid creating sidewall tension
Protection
Apply flexible top coat
Avoid rigid layers
Encourage clients to oil daily
Aftercare
Client must:
Wear gloves for cleaning
Avoid tapping nails
Avoid using nails as tools
Keep nails at safe length
Maintain appointments every 10–14 days
Trauma Doesn’t Stop Services — It Requires Smarter Services
Technicians who understand trauma can:
Prevent repeated breaks
Build stronger structure
Reduce service failures
Improve gel retention
Protect natural nails
Increase client trust
Deliver long-term solutions
Strengthen their professional reputation
Nail trauma doesn’t need to derail a client’s nail journey.
With proper diagnosis, reinforcement, hydration, and safe shaping, technicians can help traumatized nails grow back stronger, smoother, and more stable than before.
At OBB Nails, our goal is to give professionals the systems they need to treat trauma with confidence.


