Nội dung
ToggleA Nail’s Surface Reveals Its True Condition — If You Know How to Read It
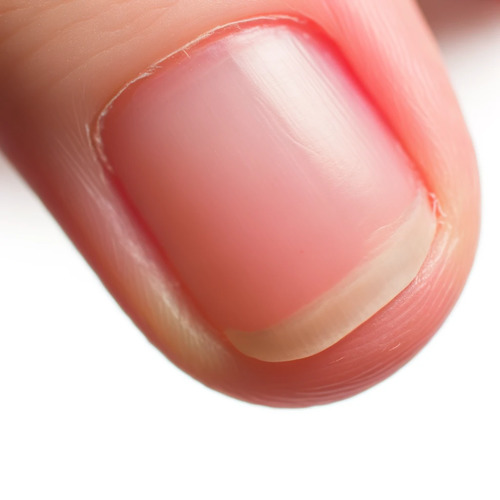
For professional nail technicians, the nail surface is more than texture — it’s data.
A smooth, even nail surface tells you:
The keratin structure is stable
The nail plate is hydrated
The matrix is healthy
The client can support length
The nail is ready for enhancement or gel
A rough or uneven surface reveals:
Dehydration
Keratin separation
Trauma
Over-filing
Acidic/alkaline imbalance
Weakness in the nail plate
Adhesion risks
Understanding nail surface health lets technicians:
Diagnose problems
Prevent breakage
Improve retention
Choose the right foundation system
Protect the natural nail
Plan a long-term strengthening protocol
In this post, we break down nail surface assessment from a professional, technician-level perspective — and how to correct issues using OBB tools and structure systems.
1. Nail Surface Anatomy: What Technicians Work With Every Day
The nail surface (dorsal layer of the nail plate) is made of flat keratinized cells.
When these cells lie tightly together → smooth surface.
When they lift or separate → roughness, peeling, ridges, weakness.
Healthy nail surface =
Tight keratin layers
Slight natural shine
Even texture
Smooth free edge
Balanced hydration
No visible trauma
Unhealthy surface =
Roughness
Peeling
Ridges
Pits
Thin areas
Chalkiness
Weak free edge
A surface problem is a structural problem, not a cosmetic one.
2. Professional Surface Assessment: What Each Sign Means
Below is the technician breakdown of what different nail surface textures reveal about client nail health.
2.1 Rough or Gritty Surface
Indicates keratin lifting — the top layers have separated.
Possible causes:
Over-buffing
Coarse file usage
Strong removers
Dehydration
Daily chemical exposure
Cold weather
What it means for technicians:
Adhesion risk.
Surface must be stabilized before enhancement.
2.2 Peeling (Delamination)
This happens when nail layers separate horizontally.
Causes:
Water exposure
Harsh removers
Filing back-and-forth
Weak natural keratin
Thin free edge
Technician concern:
Nail is too soft + too dry → high breakage risk at stress area.
2.3 Vertical Ridges
Usually harmless.
Caused by natural keratin alignment or dehydration.
Technician note:
Do not buff aggressively.
Over-buffing deepens the problem.
2.4 Horizontal Ridges (Beau’s Lines)
These are caused by disruptions in matrix activity.
Reasons:
Trauma
Stress
Illness
Heavy pressure on nail
Improper enhancement removal
Technician note:
This is a “grow-out” issue — protect the ridge but don’t attempt to remove it.
2.5 Dry, Chalky Surface
Indicates moisture loss from the keratin.
Reasons:
Acetone
Sanitizer
Soap
Cleaning agents
Seasonal dryness
Technician concern:
Dry nails crack under product weight — leading to lifting and chipping.
2.6 Uneven Thickness
Happens from preparation errors or improper filing.
Reasons:
Coarse grit filing
Inconsistent pressure
Over-filing mid-plate
Buffering too frequently
Technician concern:
Uneven plates = uneven adhesion → risk of cracking or lifting.
3. Technician Protocol: Correcting Each Surface Problem
This is where OBB products and proper technique come in.
3.1 Rough Surface → Rebond & Smooth with Light Buffing
Protocol:
Very light smoothing using OBB Buffer
Apply OBB Foundation Base to flatten surface
Hydrate with Cuticle Oil
Maintain short length for 2–3 weeks
Avoid:
Coarse grit files
Deep buffing
Over-processing
3.2 Peeling Surface → Reinforce the Keratin Layers
Protocol:
Remove only loose peeling (never file into it)
Apply two thin layers of OBB Foundation Base
Seal the free edge
Hydrate client daily
Recommend gloves for cleaning
Avoid:
Filing into peel
Heavy length
Hot water application
3.3 Vertical Ridges → Manage, Don’t Remove
Protocol:
Minimal buffing
Use Foundation Base to level the plate
Hydrate cuticle to improve matrix function
Keep nails short-medium length
Avoid:
Buffing ridges flat
Course grit usage
3.4 Horizontal Ridges → Protect During Growth
Protocol:
Avoid thinning the ridge
Reinforce plate with Foundation
Keep shape simple (round/squoval)
Hydrate client
Reassess every 2–3 weeks
Avoid:
Trying to “smooth out” the ridge
Horizontal ridges = matrix trauma → only time heals them.
3.5 Dry, Chalky Surface → Moisture Restoration
Protocol:
Apply Cuticle Oil 2–3× daily
Add OBB Crystal Top Coat for protection
Encourage gloves for cleaning
Reduce acetone exposure
Avoid:
Bare nails in cold, dry environments
3.6 Uneven Thickness → Technician Rebalancing
Protocol:
Even out surface gently with OBB Buffer
Reinforce thin areas with Foundation Base
File evenly using OBB File
Keep nails shorter during rebalancing
Avoid:
Excessive filing
Hard pressure
4. Technician Surface Routine (OBB System)
Below is the professional routine to ensure healthy nail surface during every appointment.
Step 1: Analyze the Nail Surface
Identify:
Roughness
Peeling
Dryness
Ridges
Thickness discrepancies
Free edge condition
Step 2: Minimal Prep
Use:
OBB File for shape
OBB Buffer for smoothing
Avoid aggressive prep — the surface controls adhesion.
Step 3: Apply Reinforcement
Use:
Benefits:
Levels surface
Protects keratin
Strengthens flexible nails
Provides adhesion base
Step 4: Seal with a Flexible Top Coat
Use:
This prevents surface dehydration and micro-damage.
Step 5: Establish Client Aftercare
Recommend:
Daily oil
Gloves for cleaning
Avoiding picking or peeling
Maintaining length while surface repairs
Returning every 10–14 days for reassessment
5. Technician Mistakes That Damage Nail Surface
These mistakes push clients into the damage cycle:
1. Over-buffing
Causes thinning, roughness, and peeling.
2. Using coarse grit files (80–150)
Damages keratin structure.
3. Buffing to remove ridges
Weakens the nail plate unnecessarily.
4. Filing back-and-forth
Separates keratin layers → peeling.
5. Poor product removal techniques
Acetone oversaturation → chalky surface.
6. Adding heavy extensions to weak surfaces
Forces stress on a nail that cannot support it.
7. Not sealing the free edge
Causes water infiltration and surface breakdown.
6. How Long It Takes to Repair Surface Problems
|
Surface Issue |
Typical Repair Time |
Technician Notes |
|---|---|---|
|
Minor roughness |
1–2 weeks |
Oil + light smoothing |
|
Peeling |
3–6 weeks |
Foundation + hydration |
|
Vertical ridges |
Ongoing |
Manage, don’t remove |
|
Horizontal ridges |
6–12 weeks |
Grow out naturally |
|
Chalky dryness |
1 week |
Moisture restoration |
|
Uneven thickness |
1–3 sessions |
Rebalance carefully |
Consistency + reinforcement gives the best results.
7. The Complete OBB Nail Surface Toolkit
|
Product |
Purpose |
Technician Benefit |
|---|---|---|
|
Reinforcement |
Levels surface + protects keratin |
|
|
Shaping |
Prevents surface stress |
|
|
Smoothing |
Safe for natural nails |
|
|
Protection |
Prevents dryness + cracking |
|
|
Flexible seal |
Reduces stress fractures |
This system maintains smooth, healthy nail plates and enhances adhesion and durability.
Surface Health Determines Service Success
A nail technician can apply flawless polish, create beautiful structure, and shape perfectly —
but if the natural nail surface isn’t healthy, none of it lasts.
Understanding nail surface health helps you:
Diagnose problems before they cause issues
Build better retention
Reduce breakage and peeling
Improve client satisfaction
Protect the natural nail
Deliver long-term results
Elevate your professional skill
At OBB Nails, we emphasize structure-first care.
A smooth, healthy nail surface is the foundation of every great service.
When technicians understand this, their work becomes stronger, safer, and more reliable — and clients notice.


